Building a Vue SPA with Laravel Part 4
https://laravel-news.com/building-vue-spa-laravel-part-4
We left off building a real users endpoint and learned about a new way to fetch component data with Vue router in part 3. Now we’re ready to move our attention to creating CRUD functionality for our users—this tutorial will focus on editing existing users.
Along with working through our first form, we will get a chance to look at defining a dynamic Vue route. The dynamic part of our route will be the user’s ID which matches his or her database record. For editing a user, the Vue route will look like this:
1/users/:id/editThe dynamic part of this route is the :id parameter, which will depend on the user’s ID. We are going to use the id field from the database, but you could also use a UUID or something else.
The Setup
Before we focus on the Vue component, we need to define a new API endpoint to fetch an individual user, and then later we’ll need to specify another endpoint to perform the update.
Open the routes/api.php routes file and add the following route below the index route that fetches all users:
1Route::namespace('Api')->group(function () {2 Route::get('/users', 'UsersController@index');3 Route::get('/users/{user}', 'UsersController@show');4});Using Laravel’s implicit route model binding, our controller method is straightforward. Add the following method to the app/Http/Controllers/Api/UsersController.php file:
1// app/Http/Controllers/Api/UsersController23public function show(User $user)4{5 return new UserResource($user);6}Requesting a user at something like /api/users/1 will return the following JSON response:
1{2 "data": {3 "name": "Antonetta Zemlak",4 "email":"znikolaus@example.org"5 }6}Our UserResource from Part 3 needs updated to include the id column, so you should update the app/Http/Resources/UserResource.php file to include the id array key. I’ll paste the entire file from Part 3 here:
1<?php 2 3namespace App\Http\Resources; 4 5use Illuminate\Http\Resources\Json\Resource; 6 7class UserResource extends Resource 8{ 9 /**10 * Transform the resource into an array.11 *12 * @param \Illuminate\Http\Request $request13 * @return array14 */15 public function toArray($request)16 {17 return [18 'id' => $this->id,19 'name' => $this->name,20 'email' => $this->email,21 ];22 }23}Now our /api/users and /api/users/{user} routes will respond with the id field, which we need to identify the users in our routes.
Defining the UsersEdit Vue Component
With the show route in place, we can turn our attention to defining the frontend Vue route and the accompanying component. Add the following route definition to the resources/js/app.js routes. Here’s a snippet of importing the UsersEdit component—which we have yet to create—along with the entire route instance:
We’ve added the users.edit route to the end of the routes configuration.
Next, we need to create the UsersEdit component at resources/assets/js/views/UsersEdit.vue with the following component code:
Let’s focus on the template portion first: we render a <form> around a closing div because soon we’ll need to conditionally show the form after loading the user’s data.
The <form> tag has a placeholder @submit event, and we’ve defined an onSubmit() method handler that takes an event object. The last thing I’ll mention is the v-model attributes on the <input> elements, which maps to accompanying data.users Object literal. We’ve stubbed out the default values for id, name, and email.
At this point if you load up /users/1/edit you’ll see an empty form rendered:
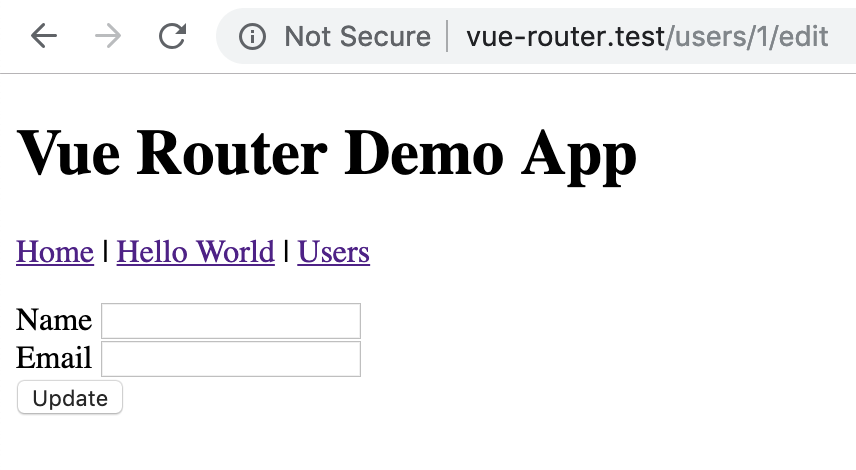
We intend on editing existing users, so our next step is figuring out how to grab the dynamic :id property from the route and loading the user’s data from the UsersEdit.vue component.
Loading User Details with a Dedicated Client
Before we load the user data in the component, we’re going to go on a side-quest to extract the /api/users resource into a dedicated API module that we can use to query all users, individual users, and update users.
First, we’re going to create a new folder and file to house the API modules for our backend. You can create these files in any way you please. We’ll demonstrate from the command line on a `Nix command line:
The users.js component is going to expose some functions we can call to do operations on the /api/users resource. This module is going to be relatively simple, but later can allow you to do any mapping, data manipulation, etc. before or after the API request. This file serves as a repository of reusable API operations:
Now we can use the same module to get all users, as well as find and update individual users:
For now, the all() method doesn’t accept any pagination query params, but I’ll leave it up to you to implement pagination and replace what we have on the UsersIndex.vue component with our new all() client function.
Loading the User from the UsersEdit Component
Now that we have a reusable—albeit very basic—API client, we can put it to work to load the user data when the edit page is rendered.
We originally stubbed out a created() function on our component, which is where we’ll request the user’s data now:
Our created() callback calls the users.js client find() function which returns a promise. In the Promise callback, we set a loaded data property (which we haven’t created yet) and set the this.user data property.
Let’s add the loaded property to our data key and set it to false by default:
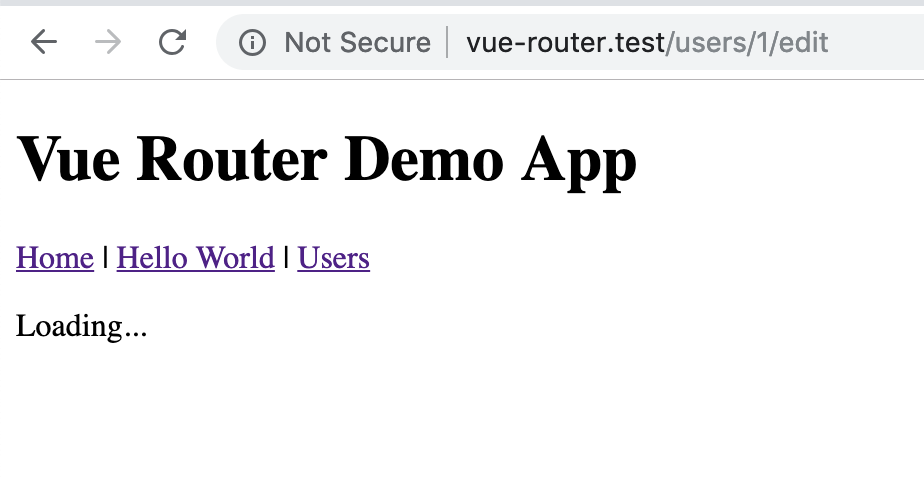
Since our component loads up the data inside of created() we’ll show a conditional “loading” message on the component initially:
At this point if you refresh the page, the component will briefly flash a Loading... message:
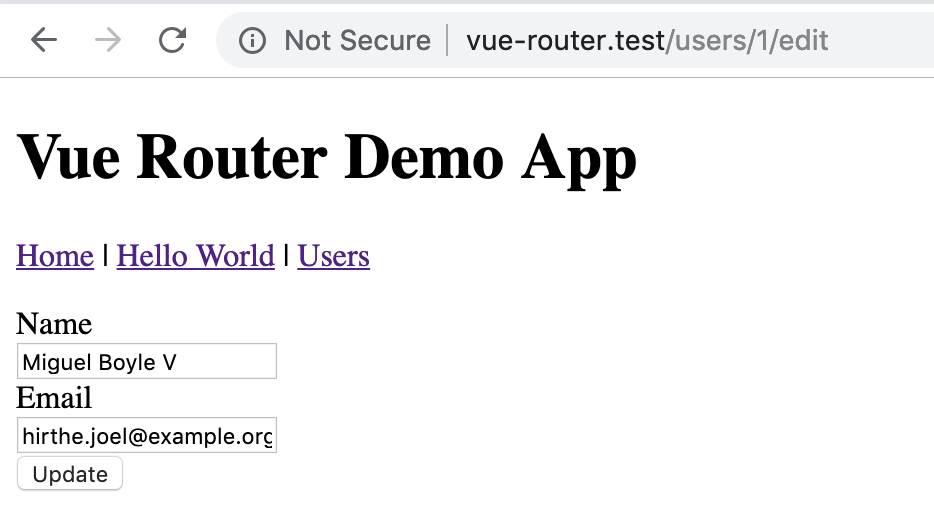
And then the user’s data should populate the form:
The API is very quick, so if you want to verify that the condition is working, you can call setTimeout to delay the setting of the this.user data property:
The above timeout will show the loading message for five seconds and then set the loaded and user data properties.
Updating the User
We’re ready to hook up the onSubmit() event handler and update the user via the PUT /api/users/{user} API endpoint.
First, let’s add the onSubmit() code and then we’ll move to the Laravel backend to make the backend perform the update on the database:
We’ve called the api.update() function with the current user’s ID, and passed the name and email values from the bound form inputs.
We then chain a callback on the Promise object to set the success message and set the updated user data after the API succeeds. After 2000 milliseconds we clear the message which will effectively hide the message in the template.
For now, we are catching any errors and logging them to the console. In the future, we may go back and cover handling errors such as server failure or validation errors, but for now, we’ll skip over this to focus on the success state.
We use this.saving to determine if our component is in the process of updating the user. Our template ensures the submit button is disabled when a save is in progress to avoid double submissions with a bound :disabled property:
Once the API request is finished, the last thing we’re doing here is setting the this.saving to false by chaining on another then() callback after catch. We need to reset this property to false so the component can submit the form again. Our last then() chain uses the _ underscore variable as a convention you’ll find in some languages indicating that there’s an argument here, but we don’t need to use it. You could also define the short arrow function with empty parenthesis:
We’ve introduced two new data properties that we need to add to our data() call:
Next, let’s update our <template> to show the message when it’s set:
Finally, let’s add a few styles for the alert message at the bottom of the UsersEdit.vue file:
We’ve finished updating our frontend component to handle a submitted form and update the template accordingly after the API request succeeds. We now need to turn our attention back to the API to wire it all up.
Updating Users in the API Backend
We’re ready to connect all the dots by defining an update method on our User resource controller. We are going to define necessary validation on the server side. However, we aren’t going to wire it up on the frontend yet.
First, we will define a new route in the routes/api.php file for a PUT /api/users/{user} request:
Next, the UsersController@update method will use the request object to validate the data and return the fields we intend to update. Add the following method to the app/Http/Controllers/Api/UsersController.php file:
Just like the show() method, we are using the implicit request model binding to load the user from the database. After validating the required fields, we update the user model and return the updated model by creating a new instance of the UserResource class.
A successful request to the backend will return the user’s updated JSON data, which we then, in turn, use to update the this.user property in the Vue component.
Navigating to the Edit Page
We’ve been requesting the /users/:id/edit page directly, however, we haven’t added it anywhere in the interface. Feel free to try to figure out how to dynamically navigate to the edit page on your own before seeing how I did it.
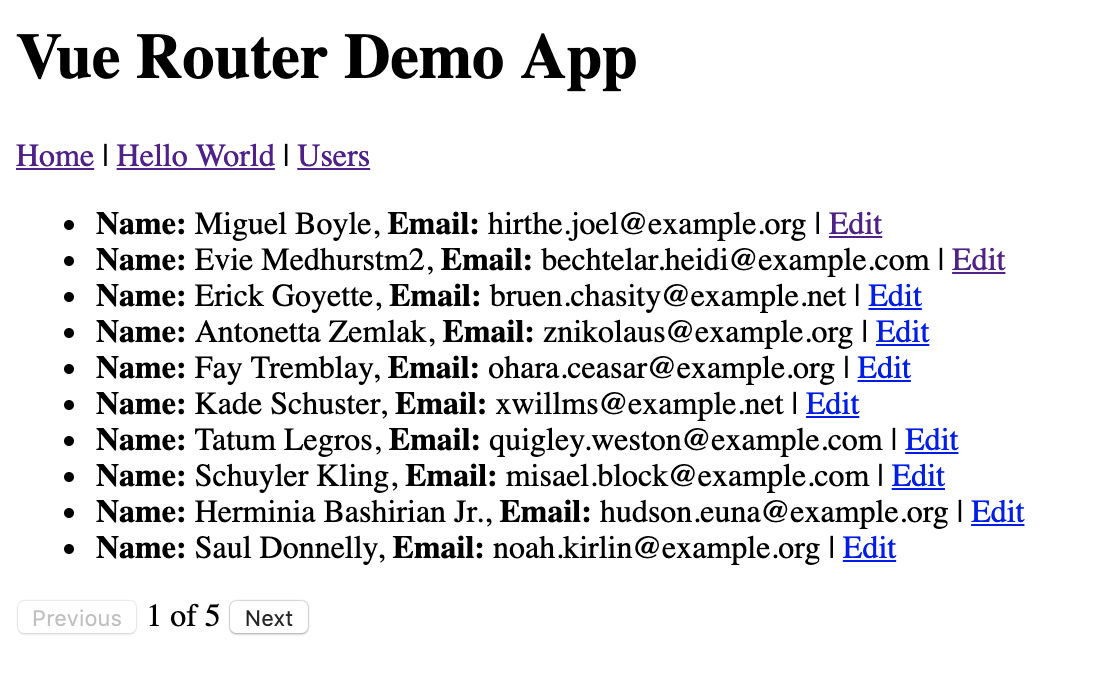
Here’s how I added the edit link for each user listed on the /users index page in the UsersIndex.vue template we created back in Part 2:
We restructure the user object in our loop to give us the id, name and email properties. We use the <router-link/> component to reference our users.edit named route with the id parameter passed in the params key.
To better visualize the <router-link> properties, here’s the route definition from the app.js file we added earlier:
If you refresh the app or visit the /users endpoint, you’ll see something like the following:
Putting it All Together
If you edit a user now, the backend should save it and respond with a 200 success if all went well. After the PUT request succeeds you should see the following for two seconds:
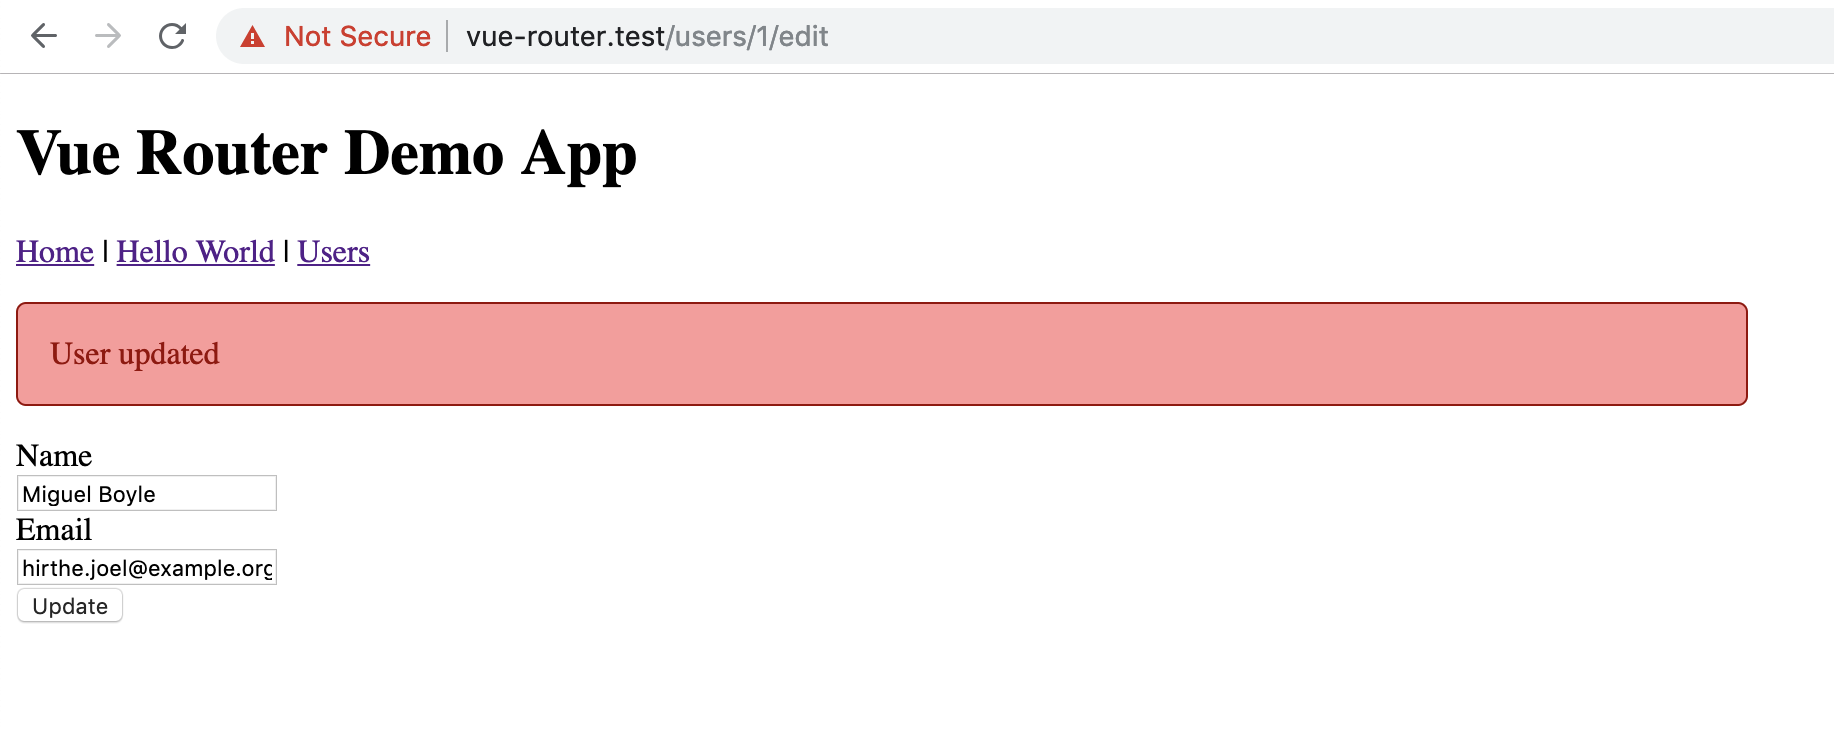
Here’s the final UsersEdit.vue component in full for your reference:
Homework
After the user update succeeds, we just reset the message after two seconds. Change the behavior to set the message and then redirect the user back to the previous location (i.e., the /users index page).
Second, add a “Back” or “Cancel” button to the bottom of the form that discards the for updates and navigates back to the previous page.
If you are feeling adventurous, display validation errors when the UsersEdit component sends an invalid request to the API. Clear the error messages after successfully submitting the form.
What’s Next
With updating users out of the way, we will move our attention to deleting users. Deleting a user will be helpful to demonstrate programmatically navigating after successful deletion. We will also look at defining a global 404 page now that we have dynamic routing for editing users.
If you’re ready, move on to Part 5.
Last updated